Migrating from Pusher
Ably provides the flexibility to migrate from Pusher progressively or all at once. The fastest we’ve seen someone migrate is a few hours.
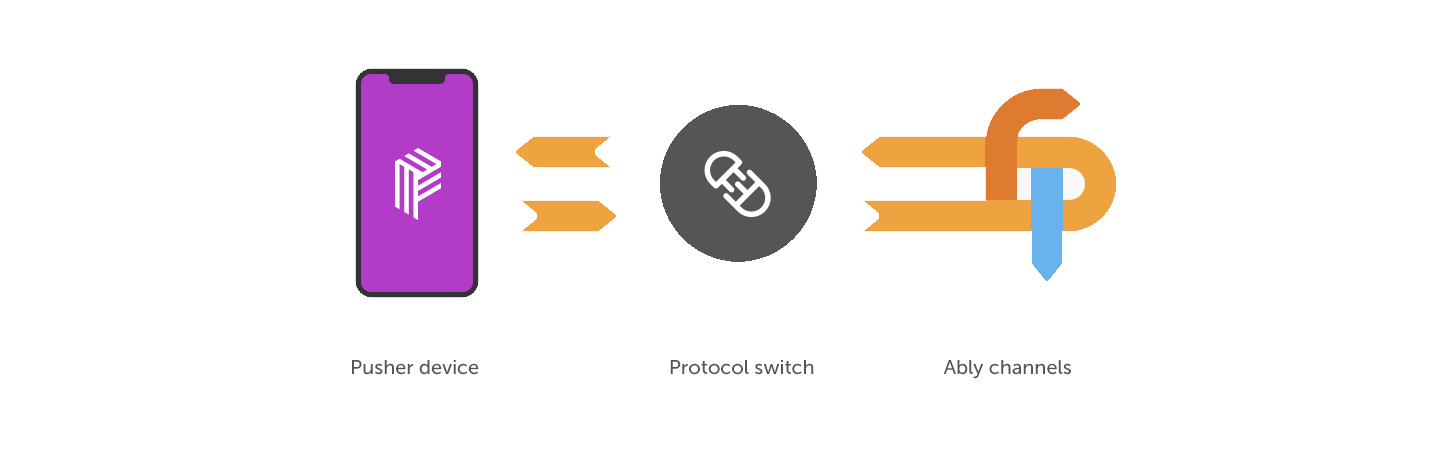
Our protocol adapter takes care of all the background translation, you simply change your API key. You can also use a Pusher client library via this adapter to work on some platforms for which no Ably client library SDK is available.
Full usage notes for the adapter are available separately in a support article: Using the Ably Pusher Protocol Adapter.
To take advantage of Ably features not supported by the Pusher client libraries such as connection state recovery you’ll need to fully migrate over to Ably. But in this tutorial, we’ll see how you can get started using the Pusher protocol adapter.
Step 1 – Create your Ably app and API key
To follow this tutorial, you will need an Ably account. Sign up for a free account if you don’t already have one.
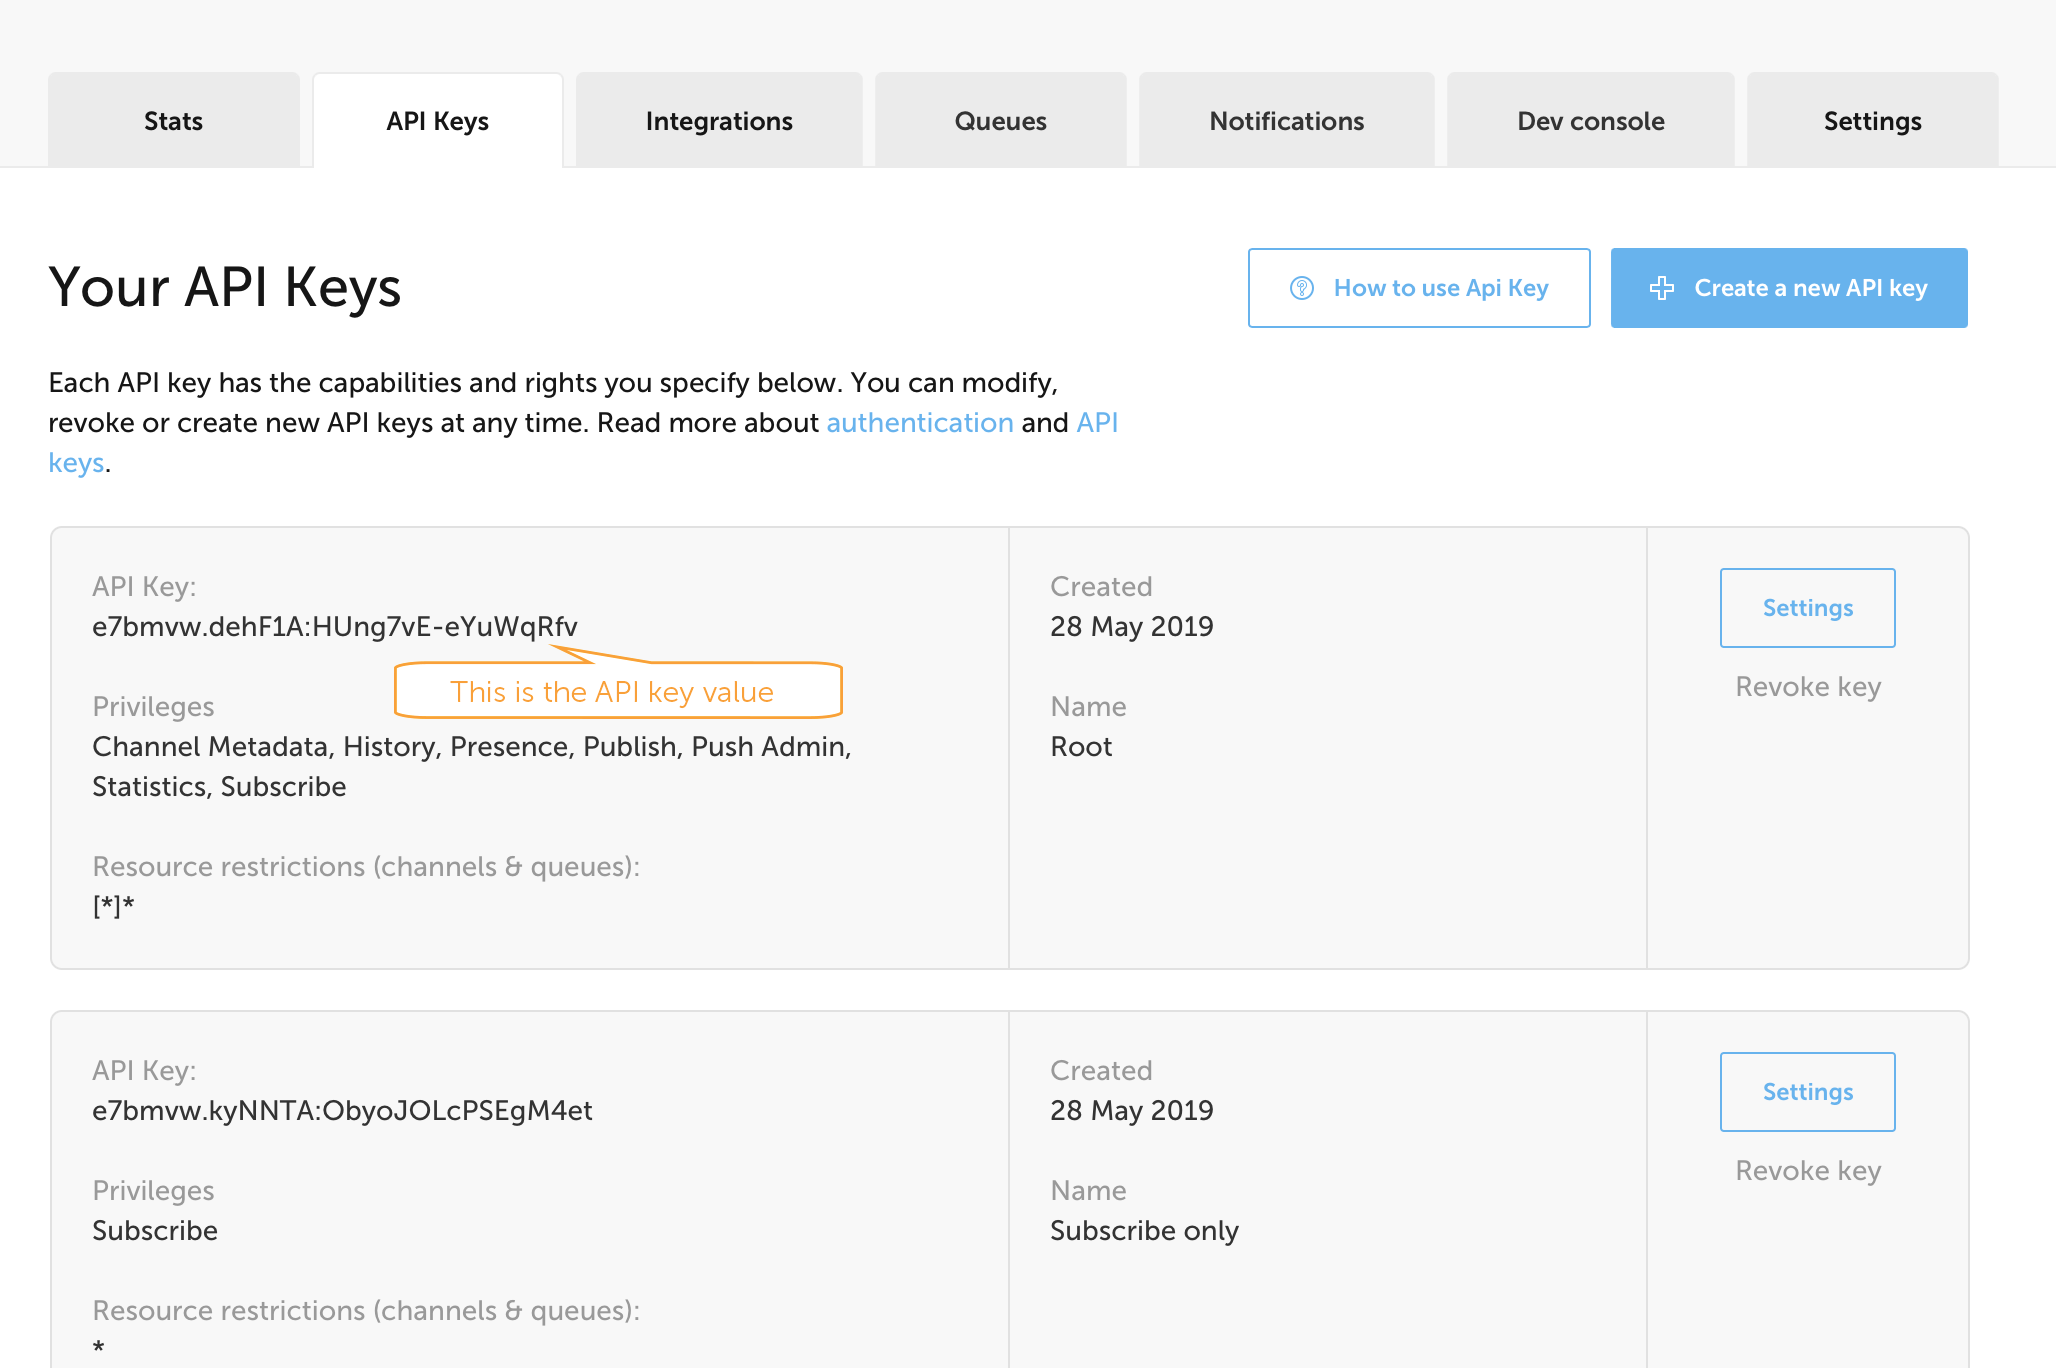
Access to the Ably global messaging platform requires an API key for authentication. API keys exist within the context of an Ably application and each application can have multiple API keys so that you can assign different capabilities and manage access to channels and queues.
You can either create a new application for this tutorial, or use an existing one.
To create a new application and generate an API key:
- Log in to your Ably account dashboard
- Click the “Create New App” button
- Give it a name and click “Create app”
- Copy your private API key and store it somewhere. You will need it for this tutorial.
To use an existing application and API key:
- Select an application from “Your apps” in the dashboard
- In the API keys tab, choose an API key to use for this tutorial. The default “Root” API key has full access to capabilities and channels.
- Copy the Root API key and store it somewhere. You will need it for this tutorial.
Step 2 – enable Pusher protocol support
- Log into your app dashboard
- Under “Your apps”, click on “Manage app” for any app you wish to use for this tutorial, or create a new one with the “Create New App” button
- Click on the “Settings” tab
- Scroll down to “Protocol Adapter Settings”
- Tick the “Pusher protocol support” checkbox
- Click ‘Save settings’
The dashboard will offer to set up some namespaces for you. Pusher public channels will use the Ably public: namespace, private channels will use the Ably private: namespace, and presence channels will use the Ably presence: namespace. Click “Create default namespaces” to set these up, which will let you change settings, such as whether messages are persisted, for each namespace.
Note on Security
Normally, you cannot connect to the Ably service at all without a complete API key, or a token derived from one. When Pusher protocol support is enabled, you can connect to public channels with only the Ably key name. So you should only enable Pusher support on an app if you’re using Pusher client libraries with that app.
Step 3 – Point your client libraries to Ably
You’ll need to modify the client library initializer by replacing your Pusher app key with the part of your Ably API key before the : (so if your API key is appid.keyid:keysecret, you’d use appid.keyid). You’ll also need to add some things to the options object, as follows:
JavaScriptvar pusher = new Pusher('appid.keyid', {
  wsHost       : 'realtime-pusher.ably.io',
  httpHost     : 'realtime-pusher.ably.io',
  disableStats : true,
  encrypted    : true
});These are in addition to whatever options you were using already, such as authEndpoint.
You’ll need to modify the client library initializer by replacing your Pusher app key with the part of your Ably API key before the : (so if your API key is appid.keyid:keysecret, you’d use appid.keyid), and the Pusher secret with the part of your API key after the :. You’ll also need to add a few other things to the initializer, as follows. Note that this example is for the Pusher node REST library; if using the realtime library, even in node, select ‘javascript’ from the ‘Show tutorial in:’ bar above.
JavaScriptvar pusher = new Pusher({
  appId     : 'appid',
  key       : 'appid.keyid',
  secret    : 'keysecret',
  host      : 'rest-pusher.ably.io',
  encrypted : true
});You’ll need to modify the client library initializer by replacing your Pusher app key with the part of your Ably API key before the : (so if your API key is appid.keyid:keysecret, you’d use appid.keyid), and the Pusher secret with the part of your API key after the :. You’ll also need to add a few other things to the initializer, as follows.
RubyPusher::Client.new(
  app_id:    'appid',
  key:       'appid.keyid',
  secret:    'keysecret',
  host:      'rest-pusher.ably.io',
  encrypted: true
)If we don’t have an example in the language you’ll be using, check the Pusher documentation for that library to find the equivalent options to the ones in the javascript example (for realtime libraries) or the ruby or nodejs example (for REST libraries) above.
Step 4 – interoperability between Pusher and Ably client libraries
Behind the scenes, the adapter uses the normal Ably service, so you can use Pusher and Ably client libraries side by side, and they’ll interoperate seamlessly. The main thing you need to be aware of is channel name translation.
Ably and Pusher both have various (incompatible) restrictions on channel names, and use namespaces very differently. So when using the adapter, channel names are mapped. For example if you connect to the channel “foo” using the Pusher adapter, it will actually use the Ably channel “public:foo”; and if you want to communicate with the Pusher client library from an Ably client library, it would need to connect to that channel.
The translation rules are as follows:
- Pusher public channels (no prefix) are mapped to the the Ably
public:namespace. - Pusher private channels (
private-prefix) are mapped to the the Ablyprivate:namespace. - Pusher presence channels (
presence-prefix) are mapped to the the Ablypresence:namespace. - Ably channels not in any of the
public:,private:, orpresence:namespaces get aprivate-ablyroot-prefix when seen from a Pusher client. - Colons are banned in Pusher channel names, but are important in Ably channel names, as they act as the namespace separator. So the adapter maps semicolons to colons: semicolons in Pusher channel names become colons in Ably channel names, and vice versa. (This means you will not be able to access any Ably channels which have semicolons in their name).
A few examples:
| Pusher adapter channel | Actual Ably channel |
|---|---|
| presence-foo | presence:foo |
| private-foo | private:foo |
| foo | public:foo |
| foo;bar | public:foo:bar |
| private-ablyroot-foo | foo |
| private-ablyroot-foo;bar | foo:bar |
Interoperability example
Here’s some code that subscribes to a channel from the Pusher client library, then publishes to it from the Ably client library:
JavaScript/* Subscribe to the 'some_channel' channel. This is actually an
 * Ably channel called 'public:some_channel' */
var channel = pusher.subscribe('some_channel');
channel.bind('message_name', function(data) {
  alert("Received a message: " + JSON.stringify(data));
});

/* Publish a message with the Ably client */
var ablyChannel = ably.channels.get('public:some_channel');
ablyChannel.publish('message_name', { 'some': ['JSON', 'data'] });Here’s some code that subscribes to a channel from the Ably node client library, then publishes to it from the Pusher node client library:
JavaScript/* Subscribe to the 'public:some_channel' channel with the Ably client */
const ablyChannel = ably.channels.get('public:some_channel');
ablyChannel.subscribe(function(message) {
  console.log('Ably client received a message: ' + message.name + ', data: ' + JSON.stringify(message.data));
});

/* Publish to the 'some_channel' channel with the Pusher client.
 * This is a public channel, so the real channel name is 'public:some_channel' */
pusher.trigger('some_channel', 'eventName', { 'Some': 'JSON data' });Here’s some code that subscribes to a channel from the Ably ruby client library, then publishes to it from the Pusher ruby client library:
Ruby# Subscribe to the 'public:some_channel' channel with the Ably client
ablyChannel = ably.channels.get('public:some_channel')
ablyChannel.subscribe do |message|
  puts "Ably client received a message: #{message.name} - #{message.data.inspect}"
end

# Publish to the 'some_channel' channel with the Pusher client.
# This is a public channel, so the real channel name is 'public:some_channel'
pusher.trigger('some_channel', 'event_name', {some: 'data sent by the Pusher client library'})Download tutorial source code
The complete source code of a working example of Ably and Pusher client libraries communicating with each other is available on Github.
We recommend that you clone the repo locally:
Shell scriptgit clone https://github.com/ably/tutorials.gitCheckout the tutorial branch:
Shell scriptgit checkout pusher-adapter-javascriptAnd then run the demo locally by adding your Ably API key to example.html and opening the page in your browser. (Make sure you’ve completed the preliminary steps above first; in particular, step 2 (enabling Pusher protocol support in your dashboard))
The complete source code of a working example of Ably and Pusher client libraries communicating with each other is available on Github.
We recommend that you clone the repo locally:
Shell scriptgit clone https://github.com/ably/tutorials.gitCheckout the tutorial branch:
Shell scriptgit checkout pusher-adapter-nodejsAnd then run the demo locally by adding your Ably API key to example.js and running the demo node example.js. (Make sure you’ve completed the preliminary steps above first; in particular, step 2 (enabling Pusher protocol support in your dashboard))
The complete source code of a working example of Ably and Pusher client libraries communicating with each other is available on Github.
We recommend that you clone the repo locally:
Shell scriptgit clone https://github.com/ably/tutorials.gitCheckout the tutorial branch:
Shell scriptgit checkout pusher-adapter-rubyAnd then run the demo locally by adding your Ably API key to example.rb and running the demo with bundle exec ruby example.rb. (Make sure you’ve completed the preliminary steps above first; in particular, step 2 (enabling Pusher protocol support in your dashboard))
Next steps
- Review the many reasons to migrate from Pusher to Ably
- Full usage notes for the Pusher adapter are available at: Using the Ably Pusher Protocol Adapter.
- Consider gradually transitioning to the Ably client libraries, for platforms which have them. While using the adapter gives you some of the advantages of Ably over Pusher (eg inter-region message federation), many others (e.g. connection state continuity, fallback host support, accessing history, flexible channel namespaces, powerful token authentication) require the use of Ably client libraries.
- Get in touch if you need help